Snow plough attachment for ride-on mowers: make light work of winter shovelling
The STIHL snow plough attachment makes your ride-on lawn mower an invaluable winter helper. Find out how to fit and use it safely.
12.07.2023

Snow-clearing for safety
Snow settling on the ground is a beautiful sight that often meets with excitement but it can also quickly pose a hazard to pedestrians and road users. Whether it’s just on your own driveway or you have a larger area of land, it’s a good idea to clear snow from any areas people will be walking or driving on. Your local council is most likely responsible for clearing snow or gritting the road and path outside your house, but if the snow arrives suddenly it may be quicker for you to clear these areas too and your neighbours will surely thank you for it. If you have a ride-on mower, once you add a snow plough attachment the work will be finished so quickly that you’ll be eager for more areas to clear!
It’s easy to turn your ride-on mower into a snow plough
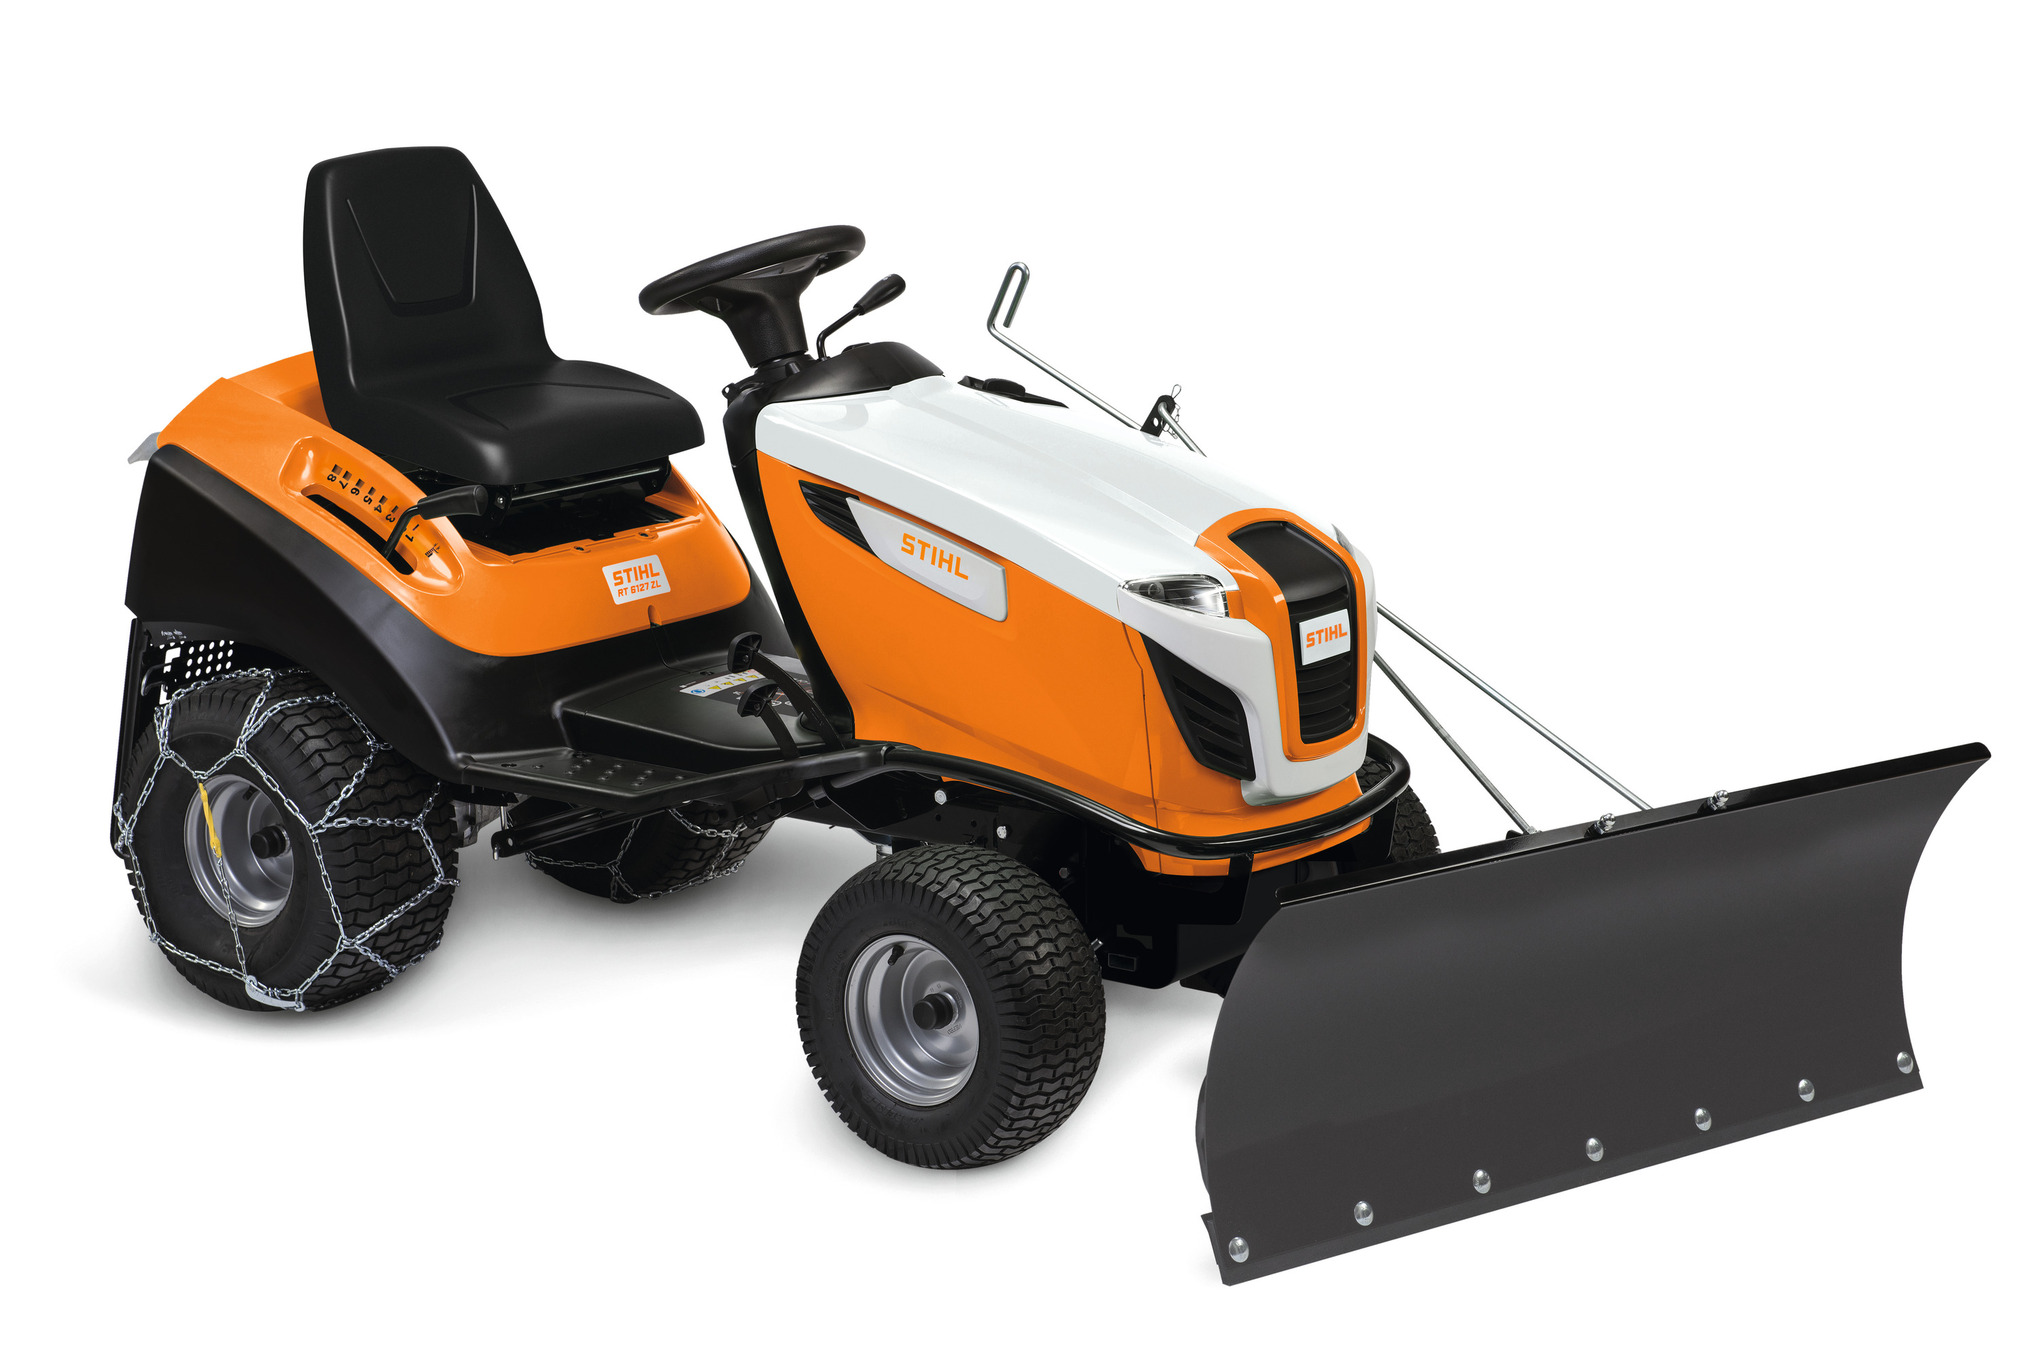
Fitting the snow plough attachment to your ride-on mower is simple. You’ll first need to detach the mowing unit, and fix a mounting frame to the vehicle; this is a bracket that enables you to fit the snow plough blade to the ride-on mower. The mounting frame includes key functional parts such as a lifting arm and swing arm, as well as a hitch (A-frame coupler) for the snow plough attachment. Our step-by-step instructions take you through the rest of the process.
Step 1: prepare your ride-on mower for snow plough installation
Before you install the snow plough make sure that your ride-on mower engine is switched off and the hand brake is engaged. Then lower the A-frame coupler as far as it will go, and swing it into the middle position.
Step 2: prepare the snow plough for docking
In order to fasten the snow plough onto the ride-on mower, you must first remove the safety pin in the centring bolt (located above the A-frame coupler). To do so, open the safety pin’s retainer clip and pull the pin out.
Step 3: hitch the snow plough to the ride-on mower
Lift the snow plough up and then lower it into the two guide rails (grey sections). The centring bolts on the top face of the A-frame coupler should now slide into the bore of the snow plough hitch.
STIHL professional tip: The snow plough attachment weighs 36 kg, so we recommend you have someone to help you at this stage.
Step 4: secure the snow plough to the ride-on mower
The final step is to secure the hitched snow plough onto the ride-on mower: guide the previously removed safety pin back through the centring bolt bore to the stop, and then close the clip.

How to remove the snow plough from the ride-on mower
Eventually it will be time to switch your mower back to summer operation. To detach the snow plough, switch off the ride-on mower engine, engage the hand brake, and carry out the installation steps in reverse order.
And remember, the STIHL snow plough attachment is not only suitable for current ride-on mowers, it also fits some older models too. Please check with your STIHL Approved Dealer that it fits your model before you buy.
STIHL ride-on mower with snow plough Attachment: clearing snow has never been easier

How to use the STIHL snow plough for ride-on mowers
Perhaps a ride-on mower with a snow plough attachment fitted sounds like it could be awkward to use? In fact, operating the STIHL combination is surprisingly simple and straightforward. The snow plough has two main positions: the transport position (with plough raised) and the operating position (plough with its full weight on the ground). The two plough positions can be easily and conveniently set by the driver of the ride-on mower, using the lifting arm. In addition to these two basic positions, the snow plough has three further operating position options that can be selected by moving the A-frame coupler on the ride-on mower. The operator can use the swing arm to choose between “straight” (90° to the driving direction), “snow plough left”, and “snow plough right”. Further information on operating the snow plough can be found in the comprehensive operating instructions with the product.
Your ride-on snow plough mower is so versatile
The snow plough means your ride-on mower has a greatly expanded scope of operation in winter. Support wheels mean that the snow plough adapts to uneven ground, and as such it can be used to plough and clear patios, paths, and driveways. The base strip of the tractor snow plough has two sharpened edges, so it can be used for both ploughing and clearing.
How to prepare the snow plough for use with your ride-on mower
Don't forget that you should detach the mowing unit before using your ride-on mower in winter and make absolutely sure you that follow the safety instructions in the operating manual. You should also ensure that you use engine oil which is suitable for low temperatures; winter engine oils are designated with the code HD 15 W40. For even better performance in cold conditions, snow chains are available for all STIHL ride-on mowers. Your local STIHL dealer will be happy to help.
Summary: STIHL snow plough attachment for ride-on mowers
- The STIHL snow plough attachment turns a ride-on mower into a snow-clearing machine
- The snow plough attachment is easy to fit
- Support wheels on the snow plough mean it can be used on driveways and patios
