How to build a DIY wooden sandpit
Our step-by-step instructions show you how easy it is build a DIY sandpit using wooden stakes and a chainsaw.
17.07.2024

A homeMADE sandpit – a easy-to-build play area for children
A DIY wooden sandpit is a great addition to any garden and it offers fantastic entertainment for all children. It means young imaginations have the chance to run wild as they build enormous castles or elaborate cakes.
We’ve put together what you need to consider before you tackle your project, so with a little skill and our step-by-step instructions, you’ll breeze through the task.
Building a DIY sandpit: choosing the right location
For this DIY project, you need to think carefully about where to build your sandpit.

It needs to be somewhere that keeps the children nearby – a spot close to a patio or window would be ideal, so you can easily keep an eye on them.
It’s a good idea to choose a semi-shaded location for your DIY sandpit, but if you don’t have a site like that in your garden, a parasol can also provide the sun protection you need.
Building a DIY sandpit: what you’ll need
These are the tools and materials you need for your DIY sandpit:

Materials list
- 13 round wooden posts or stakes with a diameter of 10 cm
- 2 planed-edge boards, at least 20 cm wide
- Wood screws
- Play sand
- Sandpit geotextile
Tool list
- Chainsaw
- Staple gun
- Cordless screwdriver
- Metre rule
- Sawhorse
- Screw clamps
Building a DIY sandpit: the right dimensions
A clear advantage of building your own sandpit is that you can build it to the exact dimensions and shape you like. Your main consideration is likely to be the amount of space in your garden, though you might also consider that the bigger your DIY sandpit, the more scope there is for your child to be creative. A larger sandpit also means enough room for siblings and friends to dig together.
In our example, we have used a size of 150 x 150 cm. Your plans should assume a depth of at least 30 cm – that’s enough for children to really have fun digging away. Our DIY sandpit design also incorporates bench seats for comfortable play or a place for supervising adults to sit. Once your sandpit is built, you just need to fill it with play sand and let the children loose!
DIY sandpit in a log cabin style
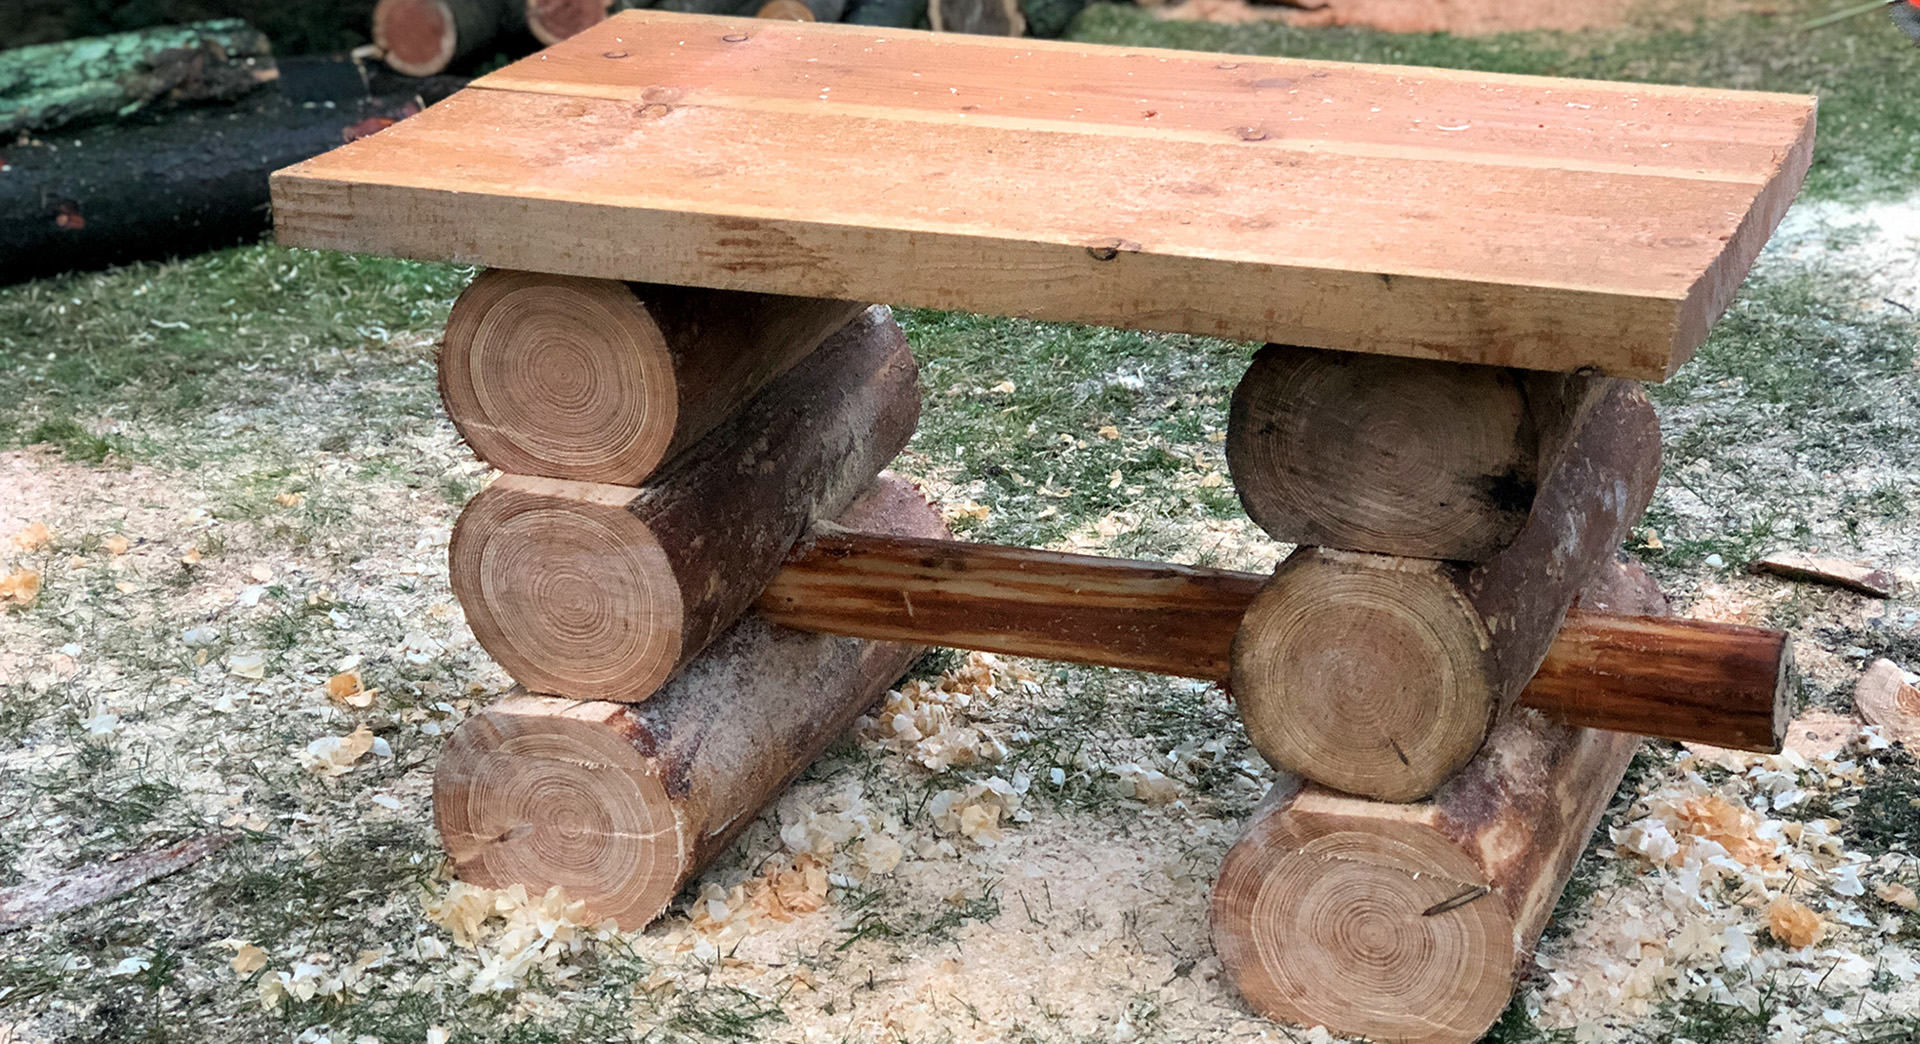
Our instructions are for a free-standing rustic design inspired by a log cabin, which makes a straightforward DIY project that looks great in any garden.
Building a DIY sandpit: step-by-step instructions
If your stakes are longer than you need, cut them to length. We used 150 cm lengths for our DIY sandpit. Measure, mark and saw off the excess wood, cutting straight across. You can round off the edges with the chainsaw to prevent people from getting caught on the corners.

This DIY sandpit will be built in the style of a log cabin, which means notches need to be sawn out so that the stakes can be stacked snugly on top of one another to form a wall. Start by marking approximately 10 cm from the end; at that spot, measure and mark across half the width of the wood – our wood is 10 cm in diameter, so the mark is at 5 cm. The notches must be in the same place on both ends of the stake, so take a wooden batten and use it to draw a straight line from one end of the wooden stake to the other.
Next, make a paper template to help you create uniform notches. This template sets out the shape you need to cut out to allow for a second stake to be placed into the notch at right angles to the first, forming the corner of your sandpit. Fold the template in the middle and align the folded edge with the halfway line you have already marked on the stake so that the notches are in the same place on both ends.
The notches are key to the structure and stability of your sandpit, so be careful when using your chainsaw to cut out the marked shape. Saw vertically into the marked-out area several times, then knock the pieces of wood out with a hammer. Carefully smooth the notch with your chainsaw; repeat these steps for both ends of 11 more stakes (keep 1 intact).
STIHL pro tip: Make the cut-out shape as round as possible so that the posts can fit together snugly and create a stable structure. For the best result, we recommend that you regularly check the fit by placing one of the round timbers into the recess as you cut it.

For your DIY sandpit to stand level on the ground, the bottom stake needs to be split lengthwise. Use the stake that doesn’t have notches, and secure it against rolling away using screw clamps. Use a long batten to draw a straight line from one end of the stake to the other. Now use the chainsaw to cut the stake in half along the mark.

Now you can assemble your DIY sandpit. First, place the two pieces of the halved stake in the preferred location to form opposing walls, and then position two round timbers notches downward onto these bottom stakes to form the other two walls of your DIY sandpit; they should fit snugly over the base stakes. Secure in place using wood screws, and repeat the process until all the stakes are installed.

Now attach the wooden seat boards to the top two timbers, using wood screws to secure these in place.

Keep your sandpit contents separated from the ground using water-permeable non-woven geotextile weed membrane. This base layer protects against insects and roots that could otherwise permeate the sandpit from below and helps to keep your sand clean.

Now your finished DIY sandpit can be filled with sand and is ready for use! Play sand is the soft and safe choice for children.

Keeping it clean in the sandpit: We all know that children love to put things in their mouths and that even sand cakes are likely to be sampled. That’s why it’s essential to keep cleanliness and hygiene in mind in your DIY sandpit as much as any other play area.
Dirt, rain and leaves can get into the sand and spread bacteria. Dogs and cats may also use sandpits as large litter trays so we do recommend covering it up. A bought or built sandpit cover means you can prevent the sand from getting dirty too quickly.
For hygiene reasons, we also recommend regularly replacing the play sand in the sandpit.
Summary: building a DIY wooden sandpit
- Identifying the right location for your sandpit is crucial. Choose a semi-shaded and dry area that is easily in your line of sight from the house. If it’s in a sunny spot, consider adding a sun cover or parasol to provide protection from the sun.
- Use specialist play sand.
- The wider and deeper your design, the more scope there is to have fun.
