How to make a DIY garden table
Make your outdoor space more inviting with a handsome wooden garden table. Follow our DIY instructions to build your own.
12.07.2023

Selecting the right wood for an outdoor table
Before getting to work, you need to decide which type of wood is most suitable for your DIY garden table. Here are some questions that can help:
- Where exactly will your garden table go? Out in the open or undercover?
- What colour wood will best fit in with your garden?
- How much ongoing wood maintenance are you willing to do?
- How big do you want to make your DIY table?
- What’s your budget?
Every type of wood has advantages and disadvantages. For example, though some softwoods are extremely weather-resistant, they also tend to exude resin and need to be treated appropriately. So if you use pine, for example, you need to make sure to weatherproof it and protect it against discolouration and fungus at the earliest possible opportunity. Hardwoods like robinia, on the other hand, are less delicate and require less care. Ideal varieties of wood to use for a DIY outdoor table include douglas fir, robinia, pine and larch.

DIY garden table: protective clothing
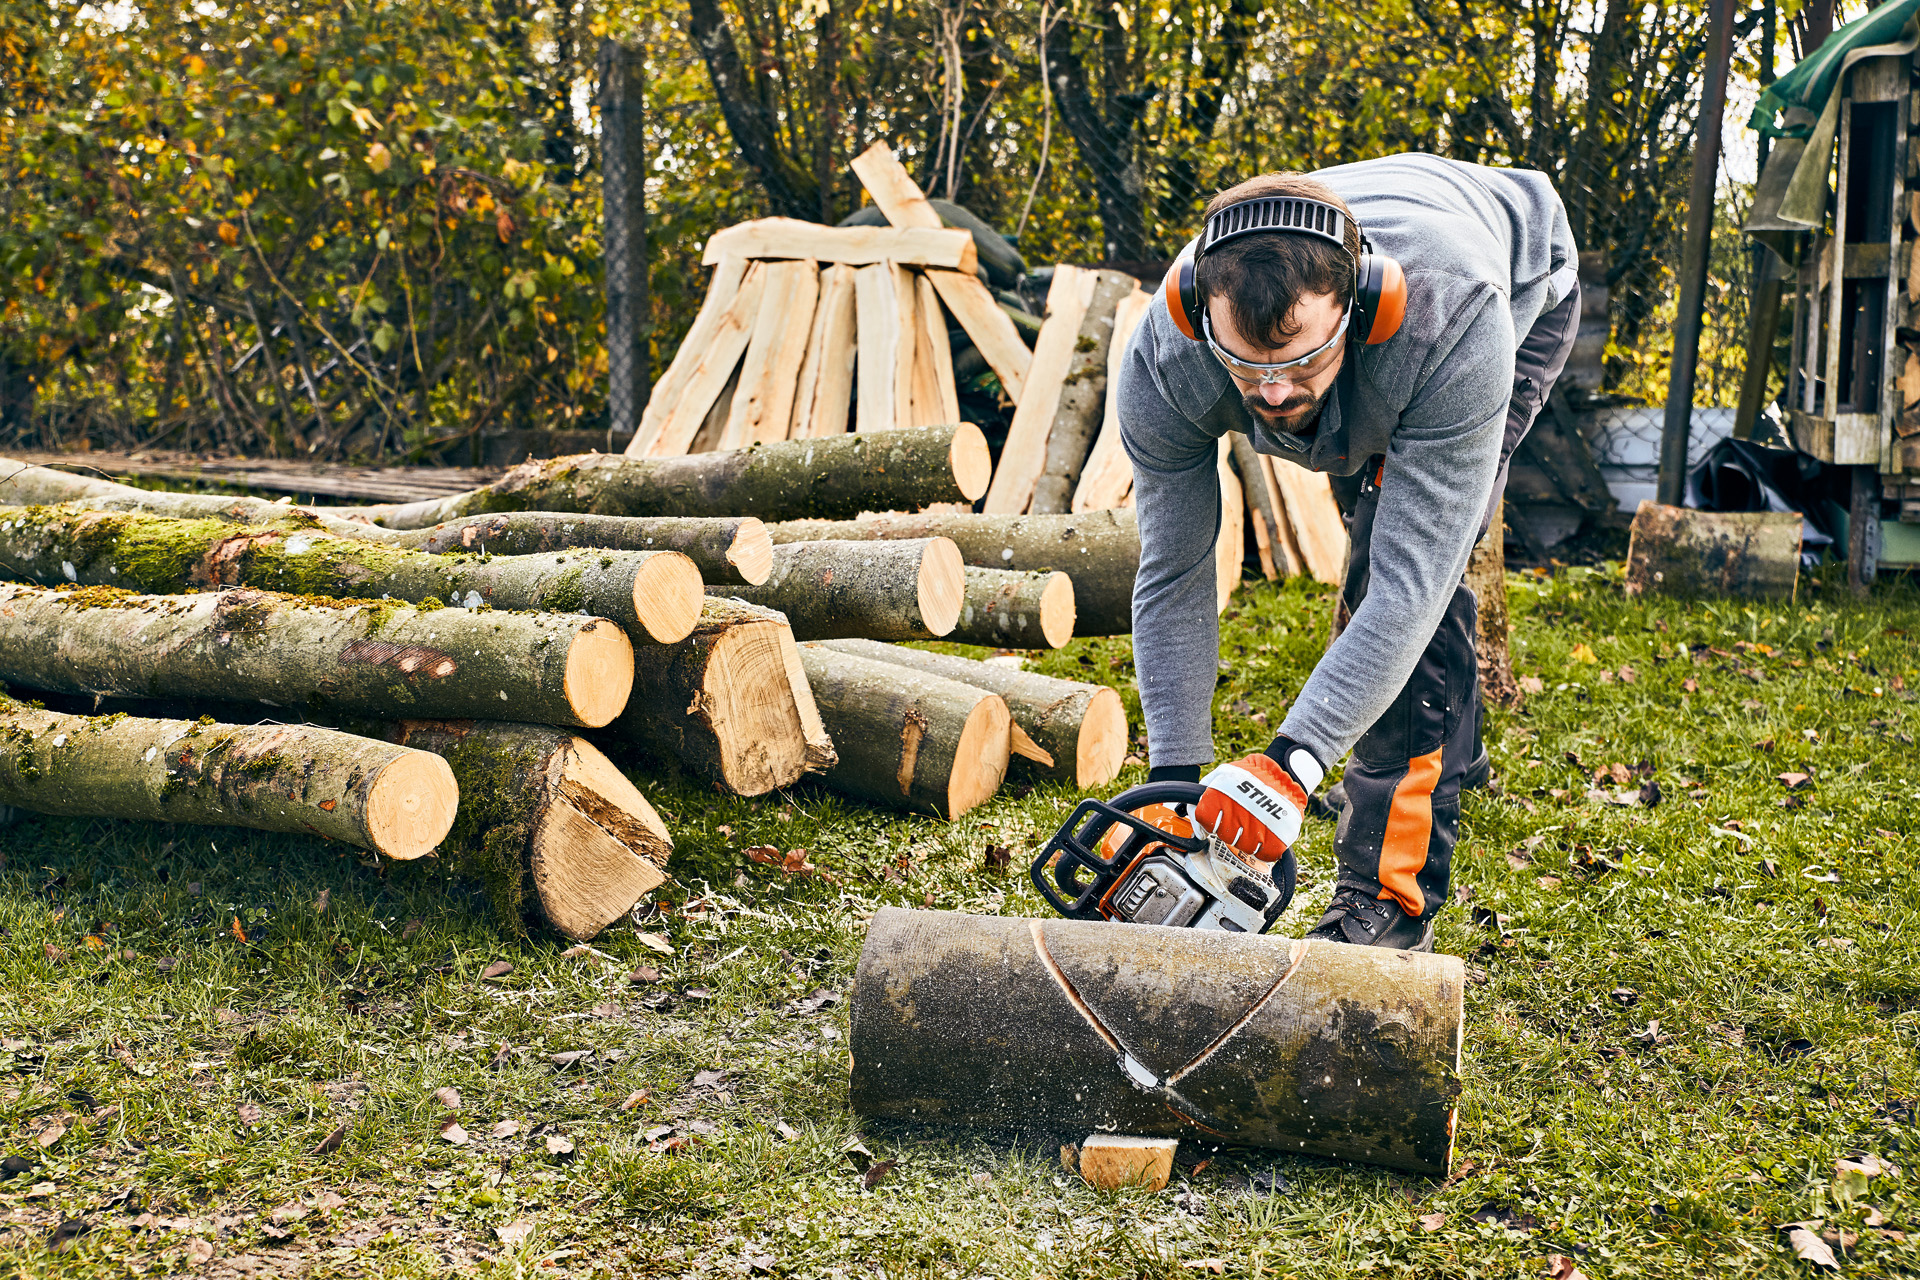
Safety first: you must always take appropriate precautions and wear the right PPE when using a chainsaw.
Wear safety glasses and use some form of personal noise protection, such as ear protectors. Hands, legs, and feet should be protected by means of robust work gloves, cut protection trousers, and boots with cut protection inserts. You can find more information about personal protective equipment here.
DIY garden table: materials required

Materials
- For the tabletop:
- 2 planks (at least 30 cm wide; length depends on the required length of the table)
- For the legs:
- A log (approx. 20 cm in diameter; bark removed)
- For the struts:
- A log (approx. 10 cm in diameter; bark removed; length depends on the required length of the table)
- 16 wood screws
STIHL professional tip: Use a debarking iron to remove the bark from the tree trunks and logs. If you don’t have one, you can buy wood with the bark already removed.
DIY garden table: how to build it

DIY garden table step 1: prepare the table legs
The legs are made up of several sections of log stacked on top of one another. The exact number of logs you’ll need depends on the height you want your table to be.
To ensure that the pieces fit together properly and offer stable support, you need to cut flat sides with your chainsaw. Stand a log upright and use a tensioning belt to fix it to something sturdy, like a metal support. Working from the top, use your chainsaw to cut vertically, as straight as possible, and take off a thin piece of wood on two opposing sides (see picture).
Do not cut right to the end of the log as you don’t want your chainsaw to come into contact with the ground.
DIY garden table step 2: cut the table legs
Lay the prepared logs on the ground so they can't roll away and secure them with several wedges. If necessary, move your chainsaw along the flat face to even out the long cuts you have already made.
Now cut the trunk into short pieces; you will later use these to build the legs for your garden table. Measure and mark the lengths you need and then saw them off the log.

STIHL professional tip: When cutting wood to length, make sure you don’t touch the ground with your chainsaw as this could cause damage. Saw to about three quarters of the way through the log, then turn it over and saw through from the opposite side to meet the first cut.
To make this DIY garden table’s legs, we stacked three pieces of wood on each side, in decreasing lengths:
- 2 pieces 60 cm long
- 2 pieces 55 cm long
- 2 pieces 50 cm long
We’ve only used different lengths for aesthetic purposes – it’s also fine to use 6 equal-sized pieces. And, of course, the beauty of DIY is that you have the chance to be creative here and come up with your own table design ideas too.
DIY garden table step 3: make the tabletop and struts
The tabletop is made from two planks of the same length. If you need to cut them to length, use a tensioning belt to fix one of the planks to the sawhorse; measure and mark with chalk; and cut off the excess length with a chainsaw. Repeat this on the second plank.
We also recommend you install a strut between the legs to give your DIY wooden table added stability. This strut should be about the same length as the tabletop, and you can cut it to length in the same way.

DIY garden table step 4: make notches for the strut
Now you need to adapt the lower pieces of the legs to accommodate the strut.
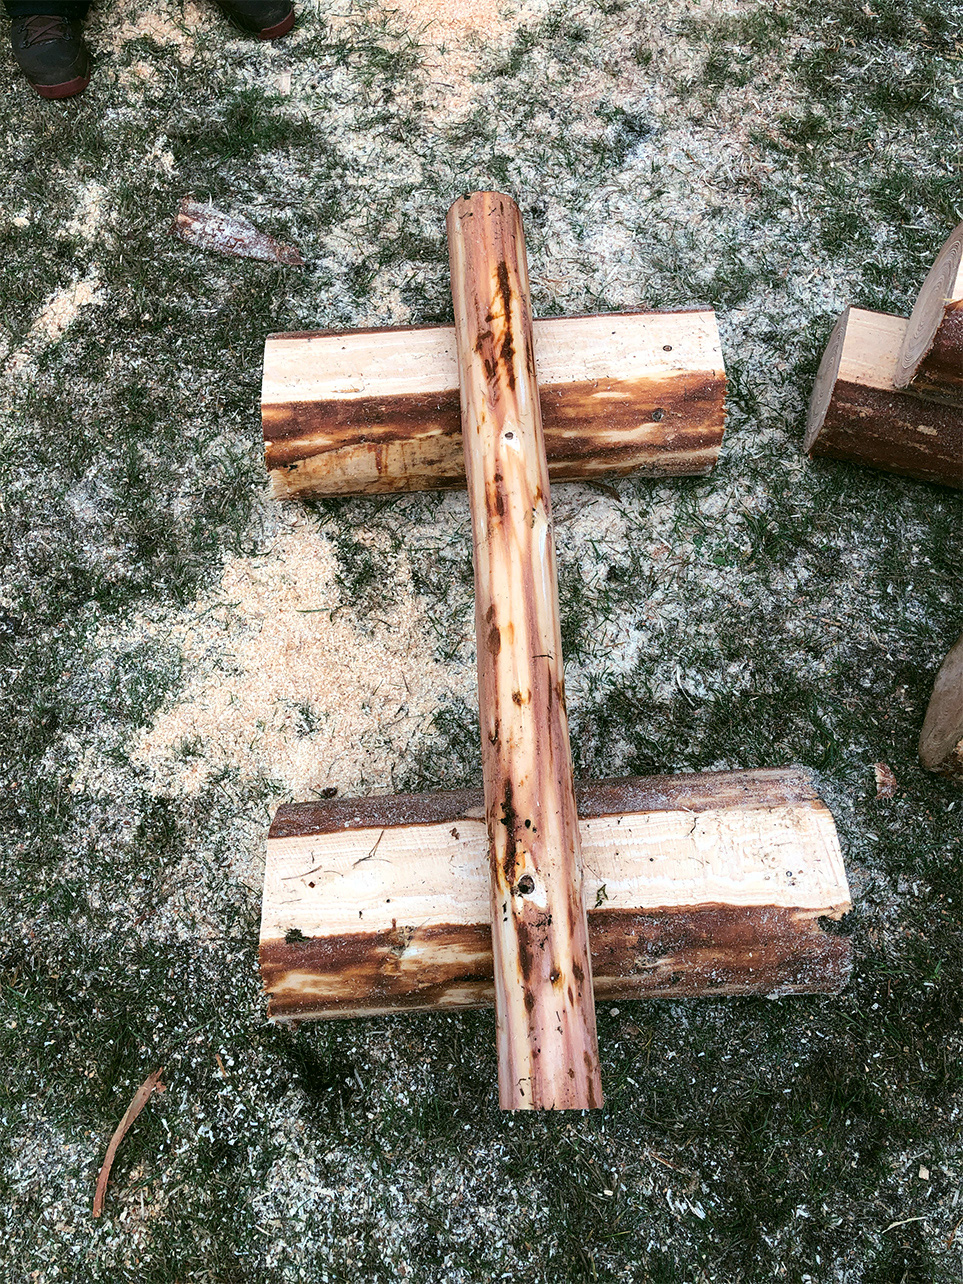
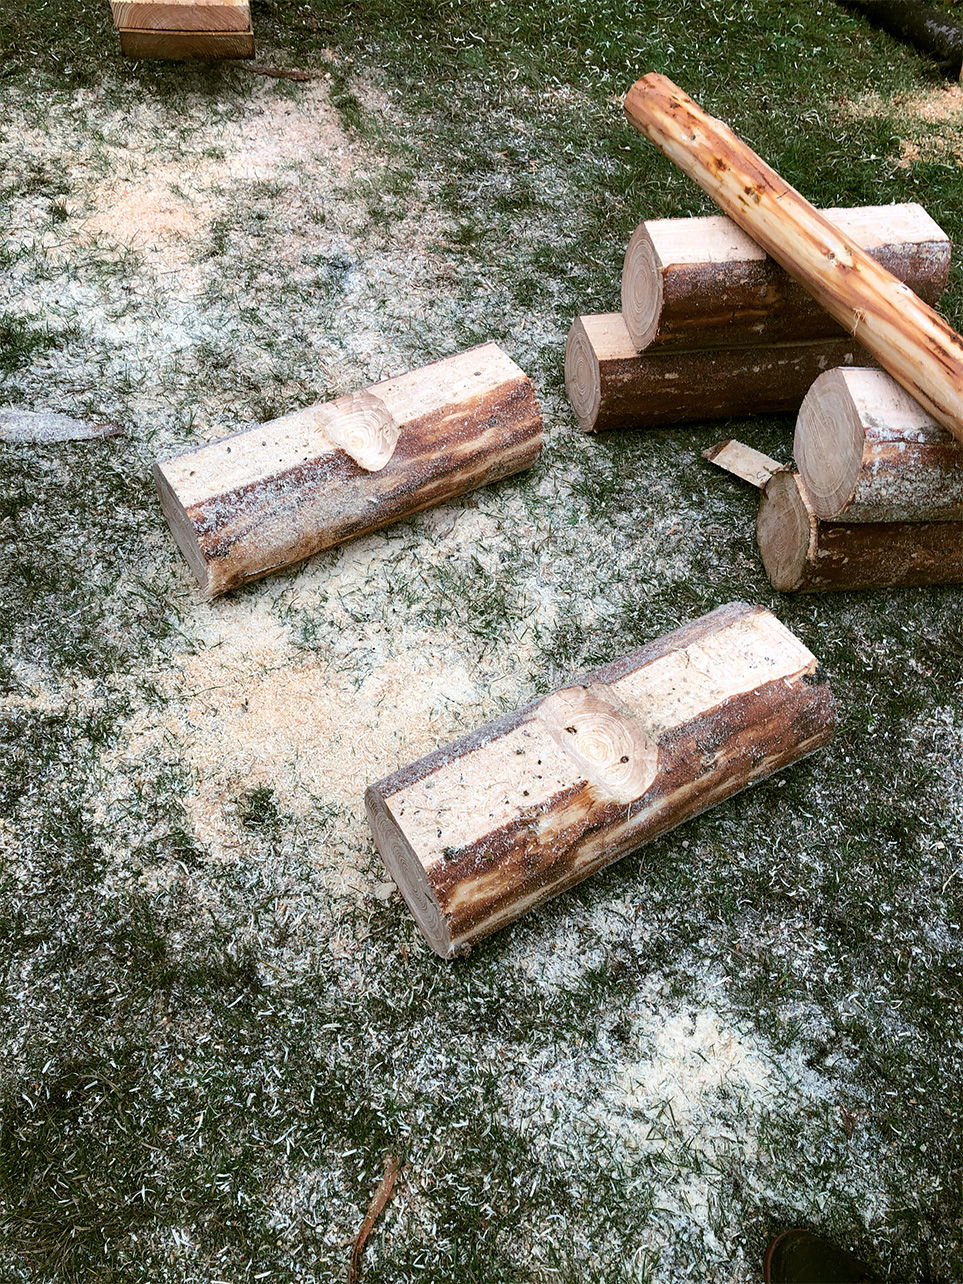
Place the two bottom logs on the ground and lay the strut across the top of them; mark the logs to indicate the width and position of the strut. Put the strut aside and use your chainsaw to cut a notch between the markings on both logs. Round out the notch as much as possible, so the strut is anchored securely.
Check the fit of the strut. Once it fits the notch nicely, repeat the process for the next layer of logs.
DIY garden table step 6: fix the legs together
Now your DIY garden table needs to be fixed together with wood screws. You need to make sure your screws reach the piece below, which may require you to first drill into the log with a large wood drill bit.
Work from the base to the top of the legs: start by fixing the middle logs to the bottom ones, then the top ones to the middle ones.

DIY garden table step 7: installing the tabletop
Finally, you need to fix the tabletop to the legs. For stability, we recommend securing each plank with 2 wood screws on each side.

Protecting and maintaining your DIY garden table
Almost done! All that remains is to treat your DIY garden table with the right maintenance products. Taking appropriate measures from the outset will protect your table from signs of use, discolouration and fungus. You can finish it with oil, wax or varnish, depending on the type of wood.
Maintenance oils and varnishes wear off and stop being effective after a while, so if you want to protect your table as effectively as possible and increase its service life, you should clean and maintain the wood several times a year. We also recommend reapplying maintenance products at least once a year.
Your DIY garden table is ready to use! Whether it becomes a surface for garden jobs, a spot to enjoy lunch, or home to patio plants, its timeless design makes it a stylish and practical addition to your garden.
Summary: DIY garden table
- Choose the wood for your garden table based on its location, size and your budget.
- Always wear protective clothing when working with chainsaws and power tools.
- Make sure the chainsaw does not come into contact with the ground when you are sawing, as this can cause premature wear.
- Treat your finished garden table with wood oil, wax or varnish to protect it from discolouration and fungus.
